Designing for Orthodontics: How Smart Spaces Improve Patient Care
When patients walk into an orthodontic office, their experience is shaped not only by the team they meet but also by the environment around them. A well-designed space makes treatment smoother, reduces stress, and helps staff work more efficiently. Here’s a look at the key elements of modern orthodontic practice design, with examples from recent projects.
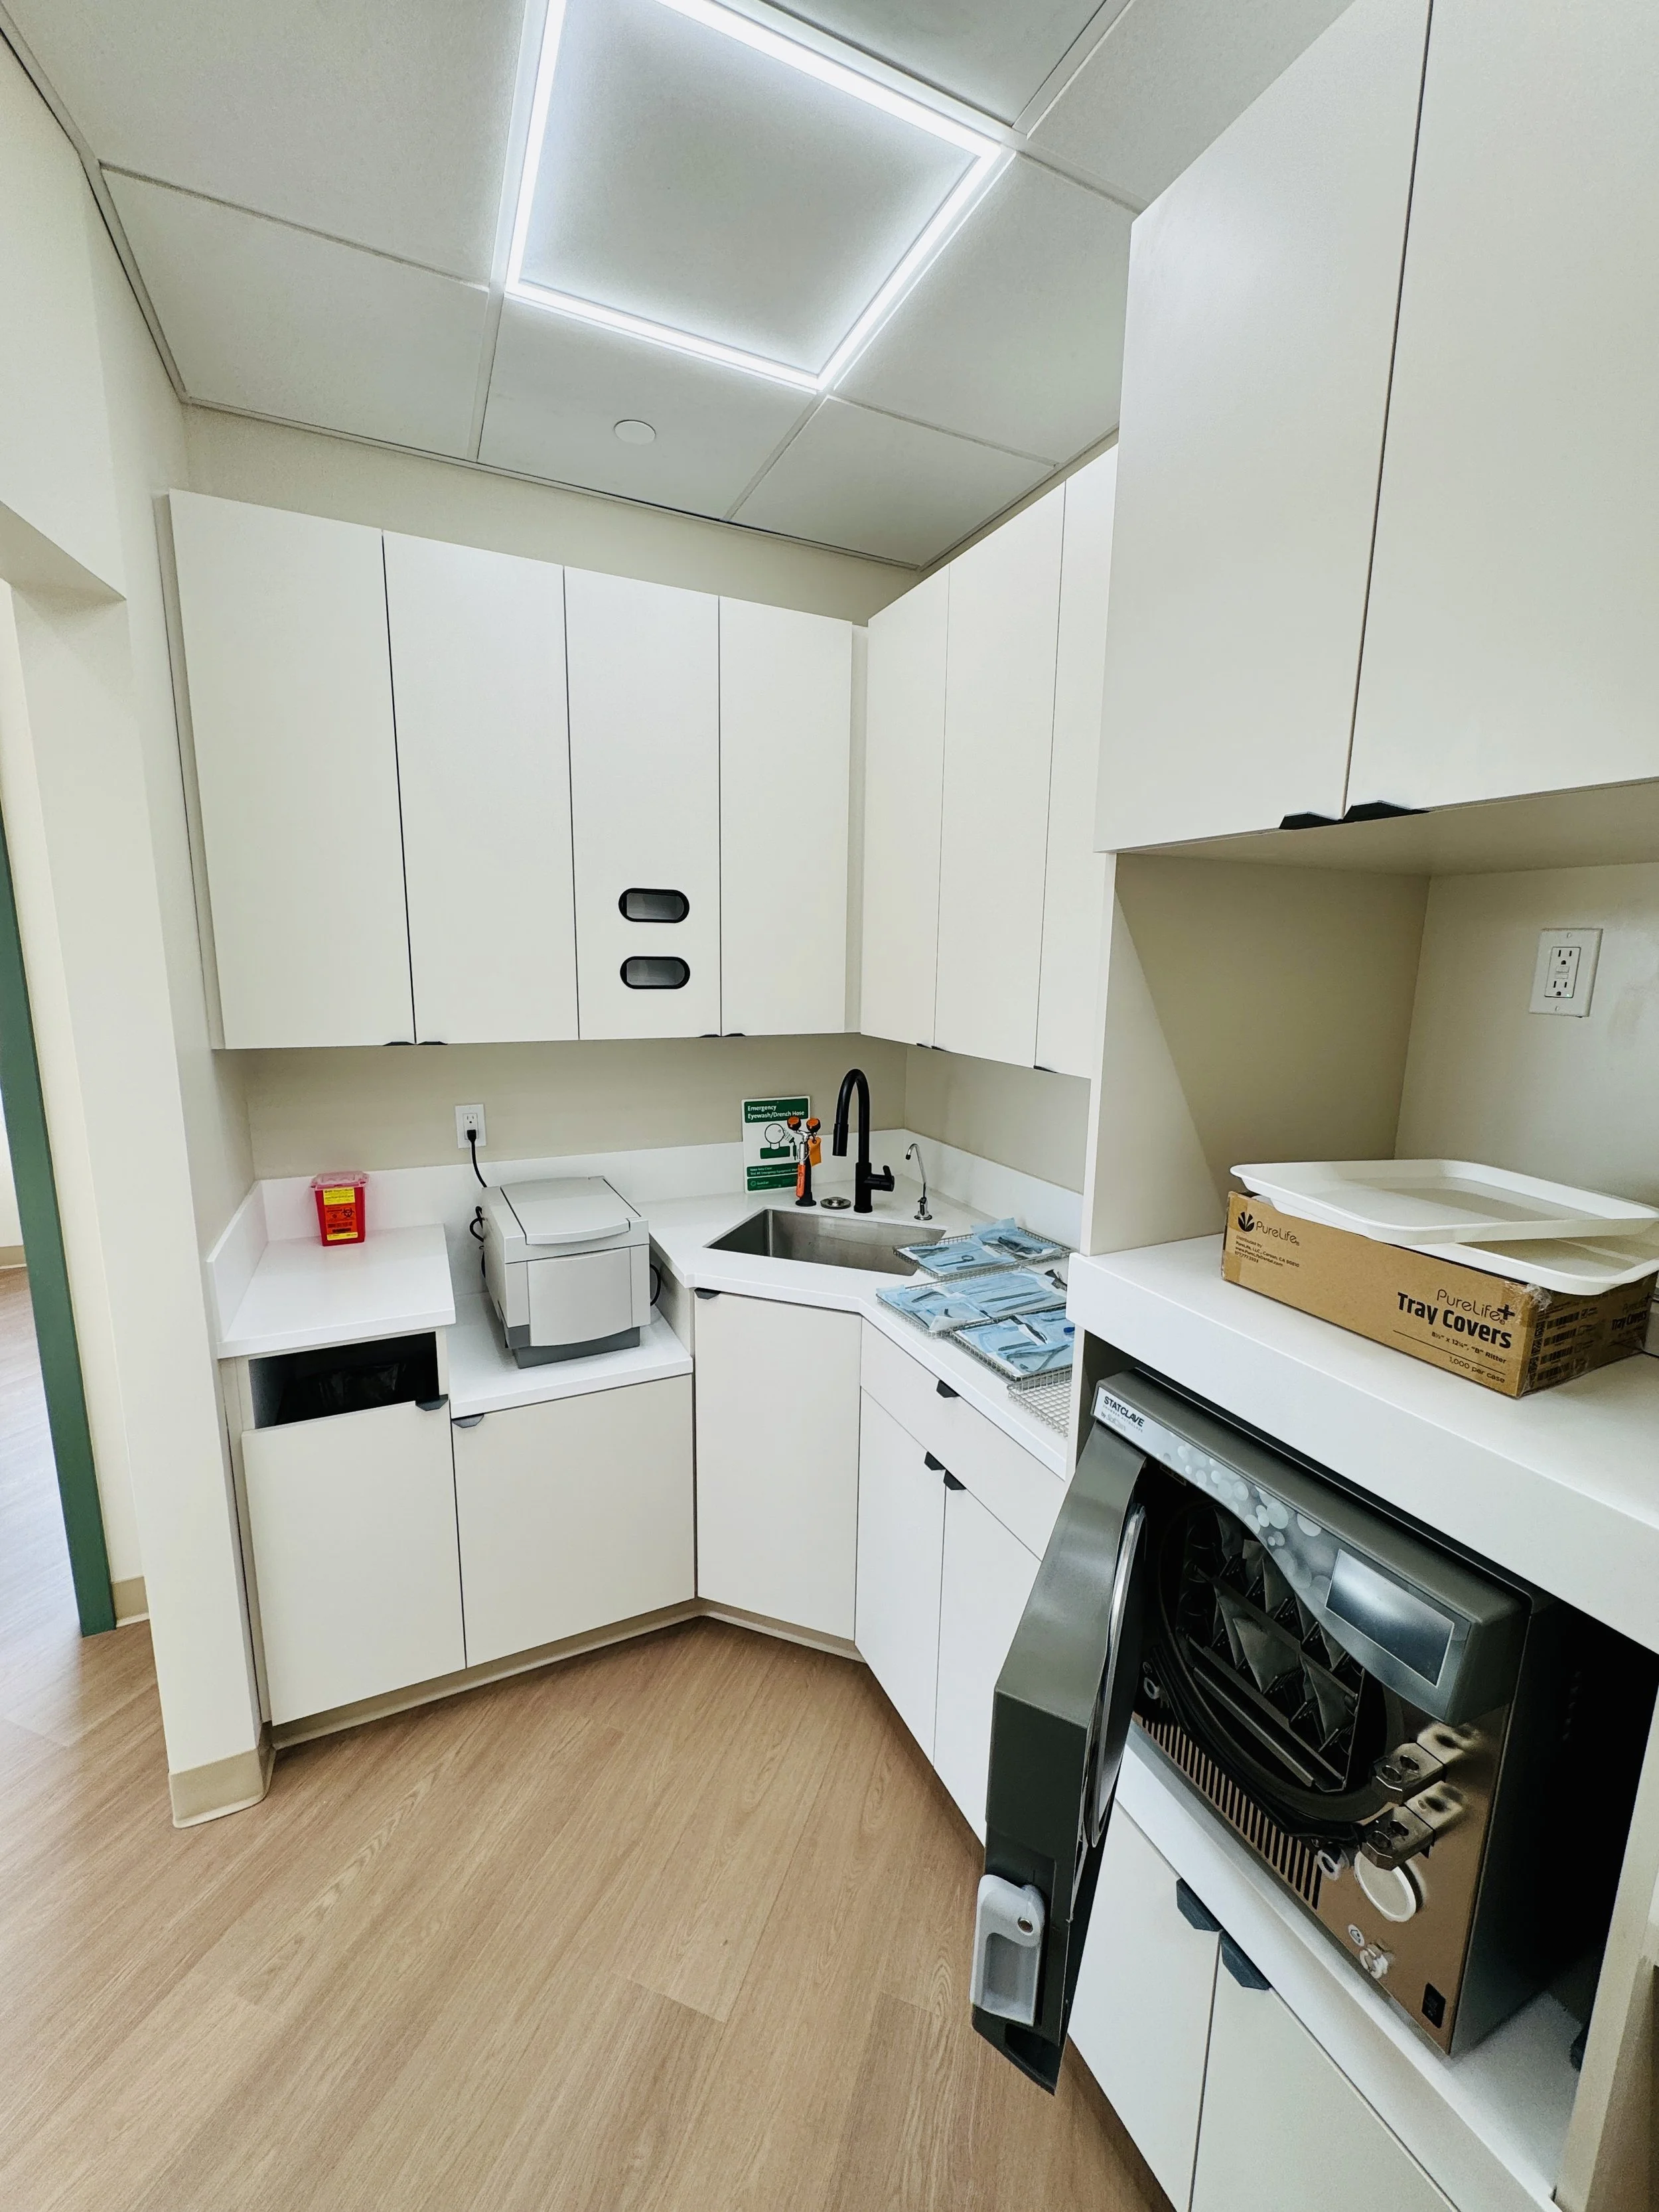
Centralized Sterilization
Sterilization is the heartbeat of an orthodontic practice. Modern designs lean toward an open concept, making the space easy to access and monitor. Centralized parking for intraoral scanners keeps essential tools within reach. This improves efficiency and keeps workflows clean.
Dedicated Consultation Rooms
Consultation spaces set the stage for patient relationships. High-end finishes, proper line-of-sight layouts, and a dedicated chair for initial exams make consultations feel professional and welcoming. This is where patients commit to treatment — design matters here.
Flexible Spaces for Growth
Every practice should have at least one flexible-use room. These areas can serve as a private office, mother’s room, or a space for adding esthetic services in the future. Locating them near waiting areas provides privacy while staying accessible.
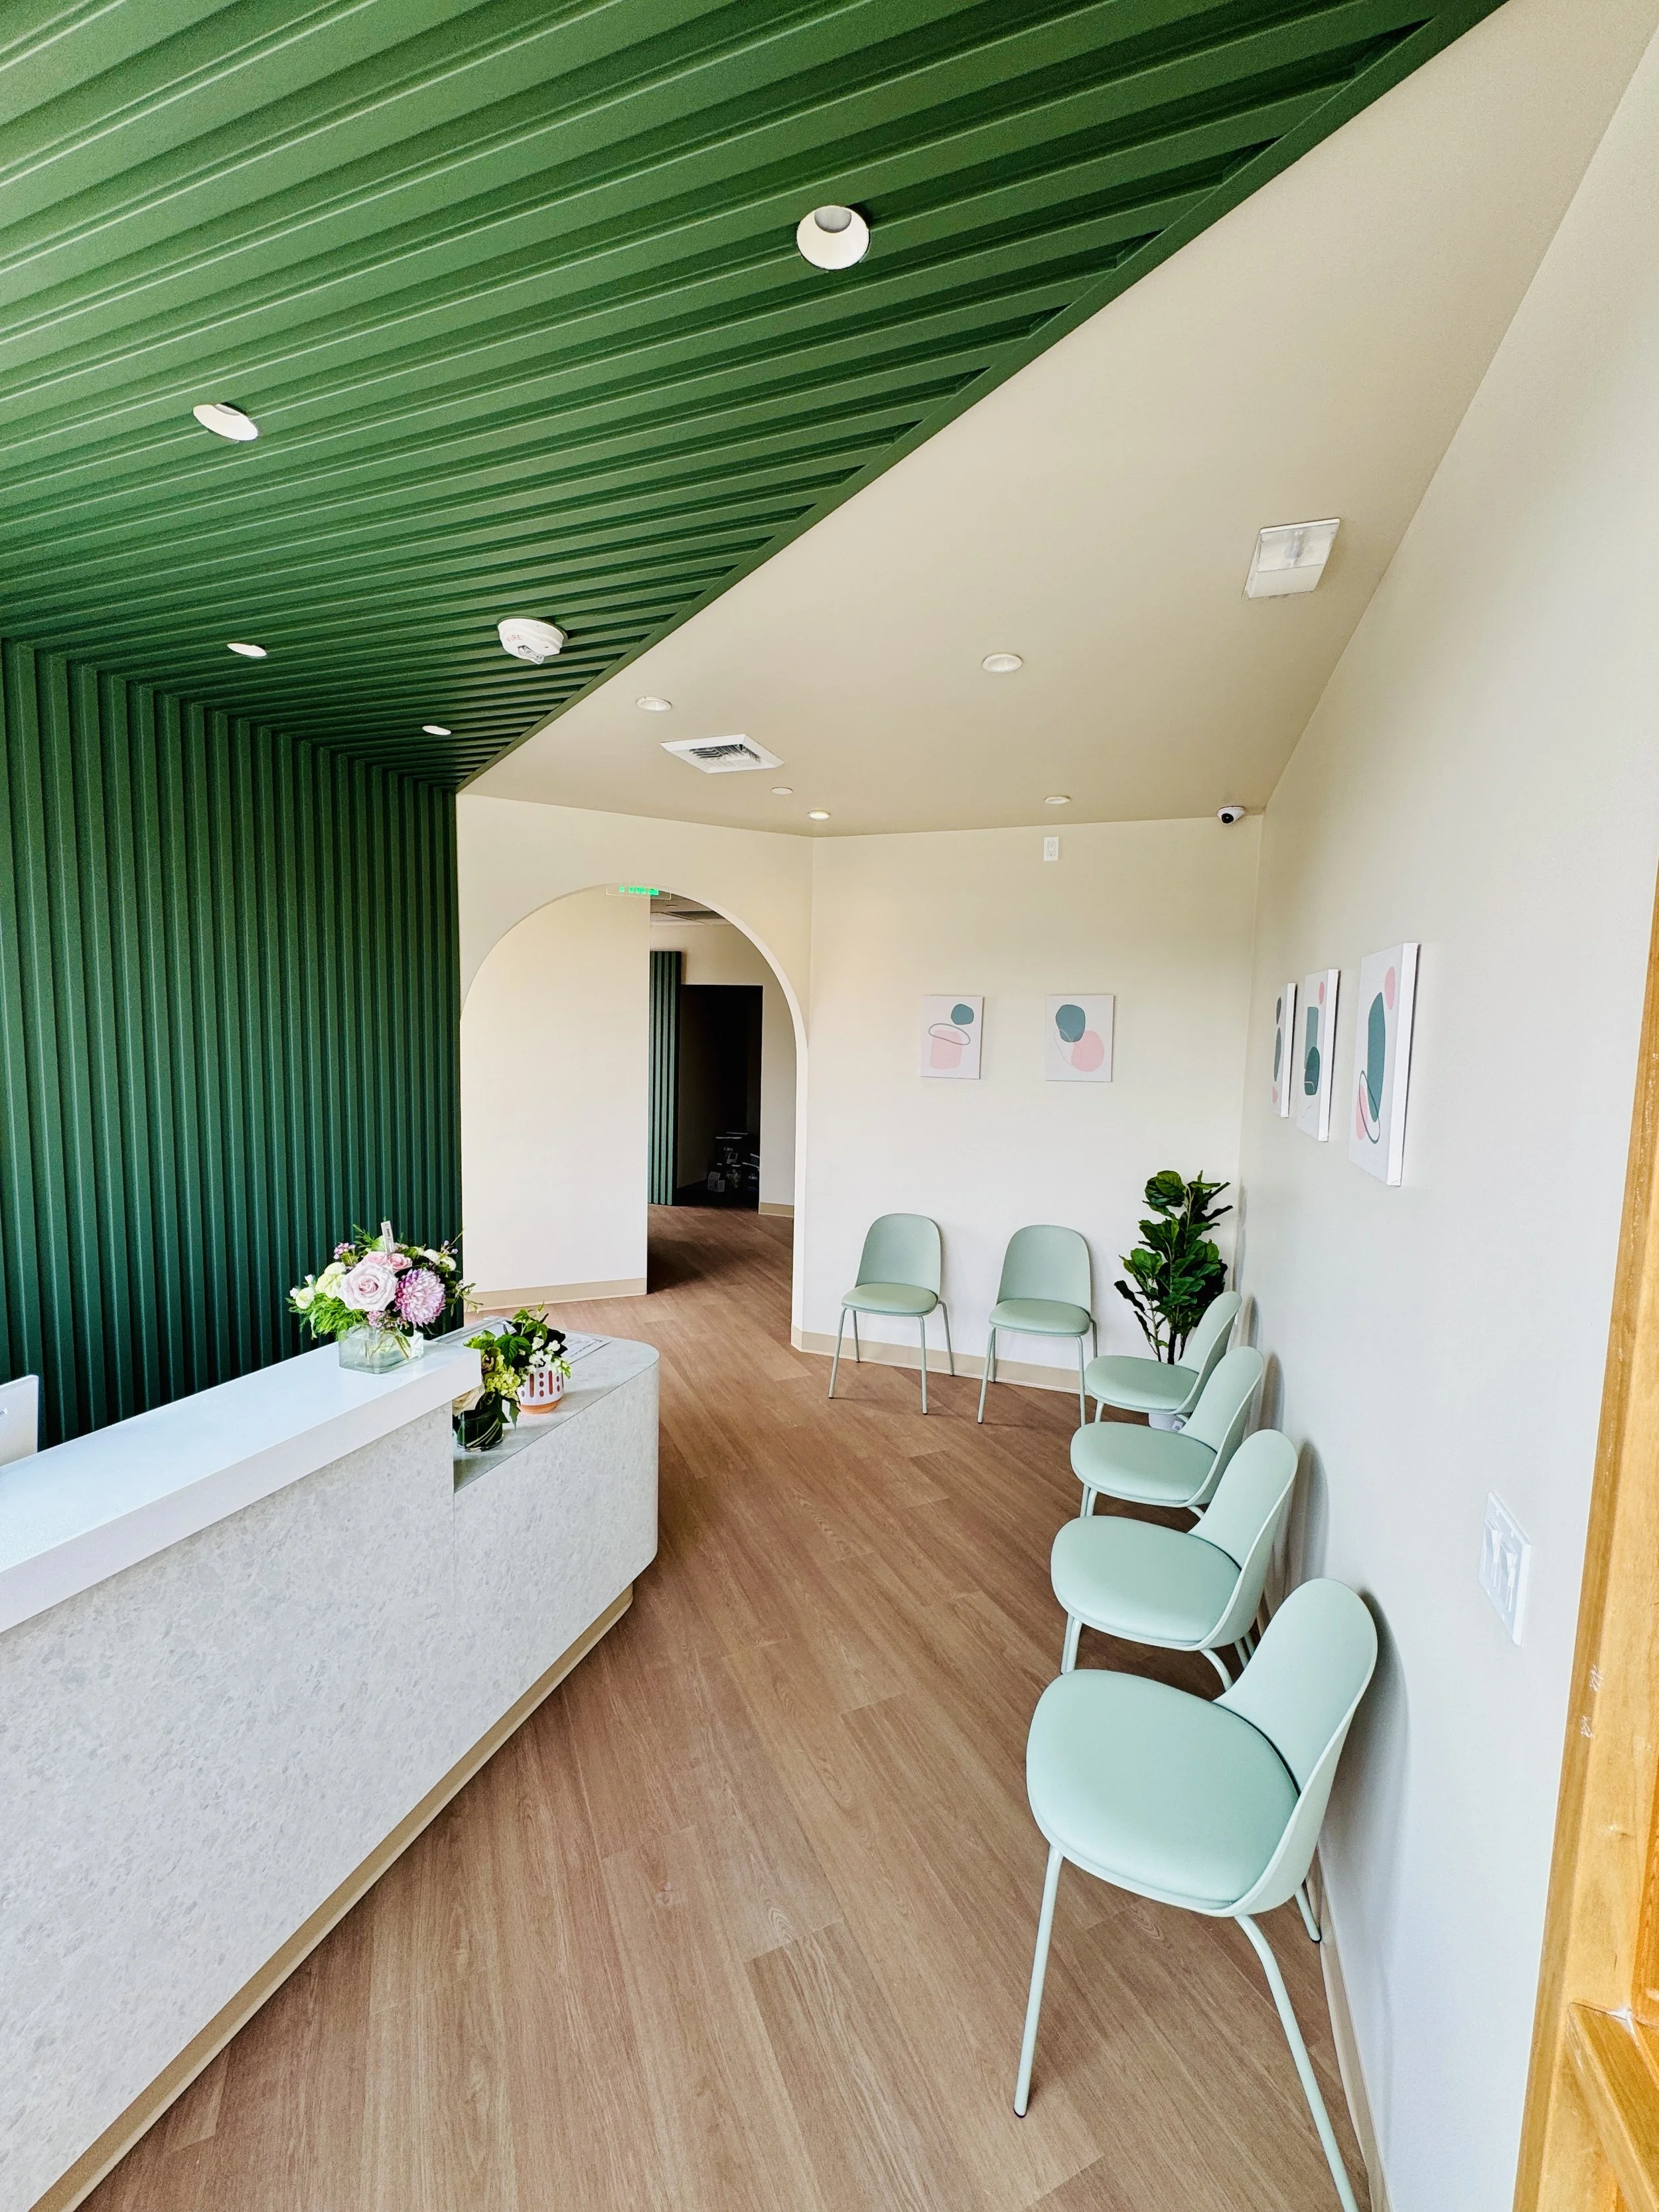
Welcoming Reception & Waiting
The waiting area creates the first impression. Orthodontic practices benefit from a variety of seating options, kids’ areas, and small amenities like beverage stations or homework desks. Open-concept reception and check-out desks make the space approachable while handling higher patient volume. Less square feet applied here will increase the treatment space.
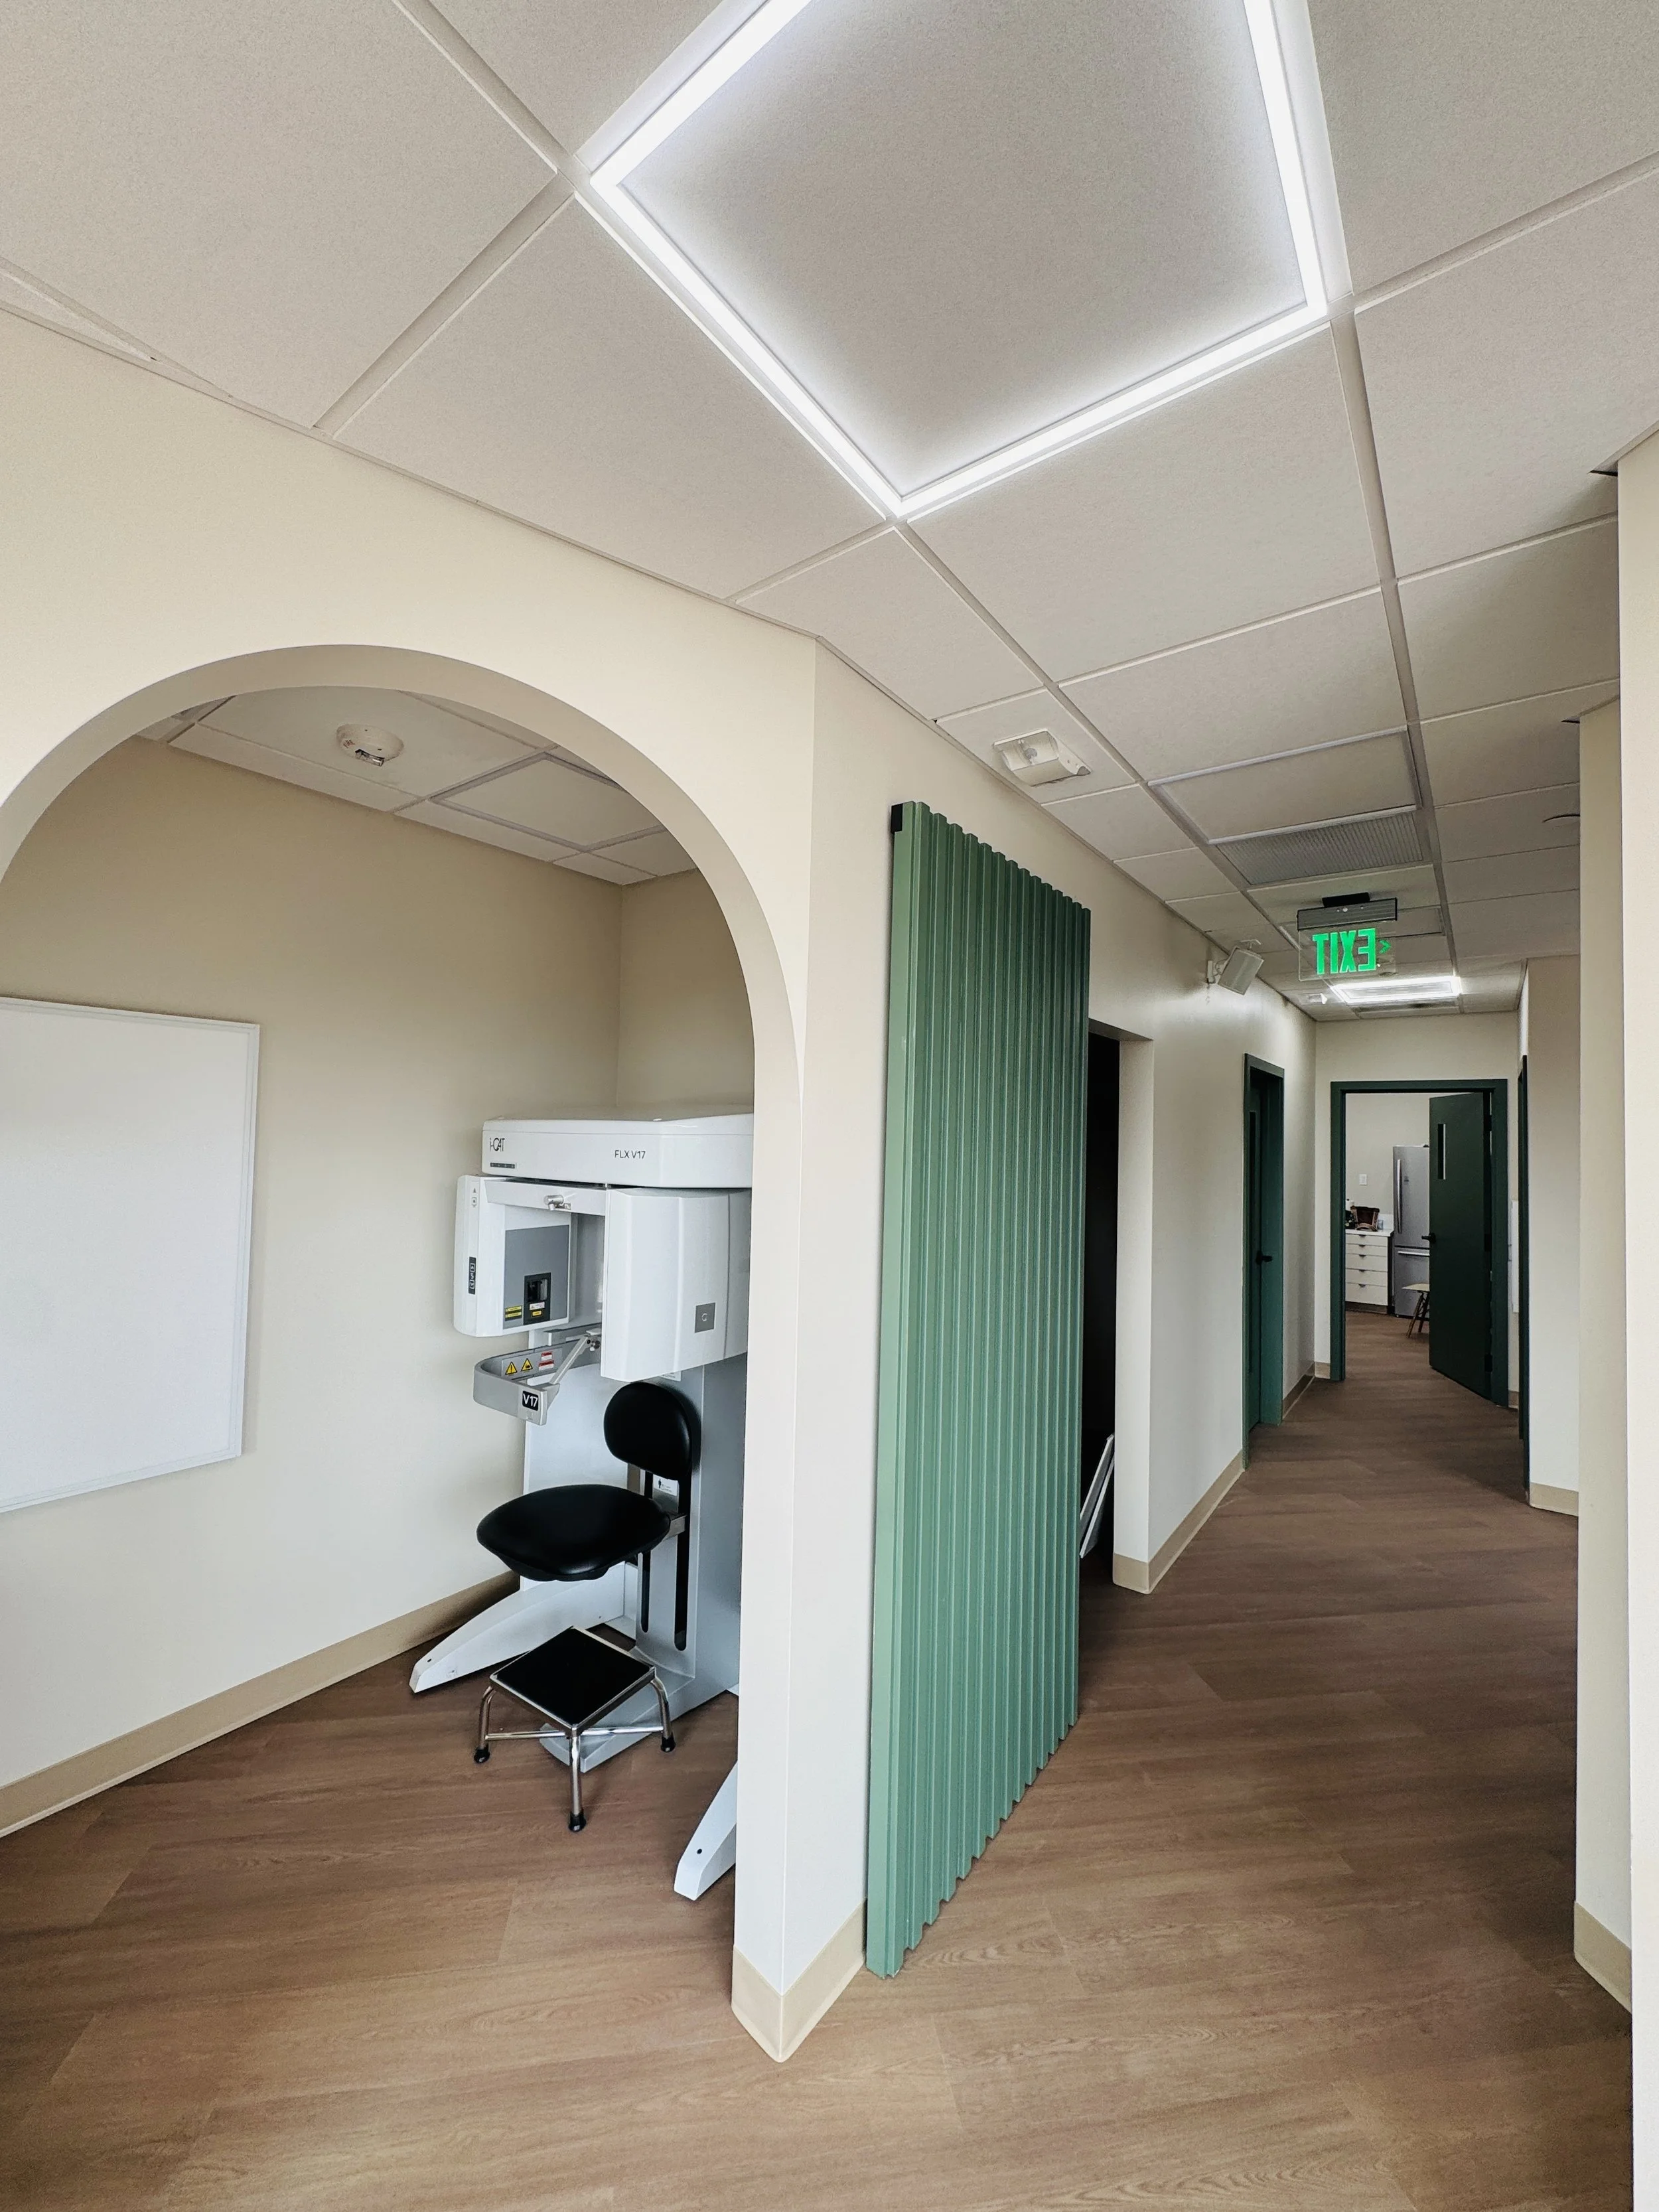
Imaging & Records
Advanced imaging is central to orthodontics today. 3D cone beam CT and pan-ceph units are typically set back in alcoves, with adjacent records rooms for smooth data flow. Positioning equipment this way allows staff to capture diagnostics without disrupting patient traffic.
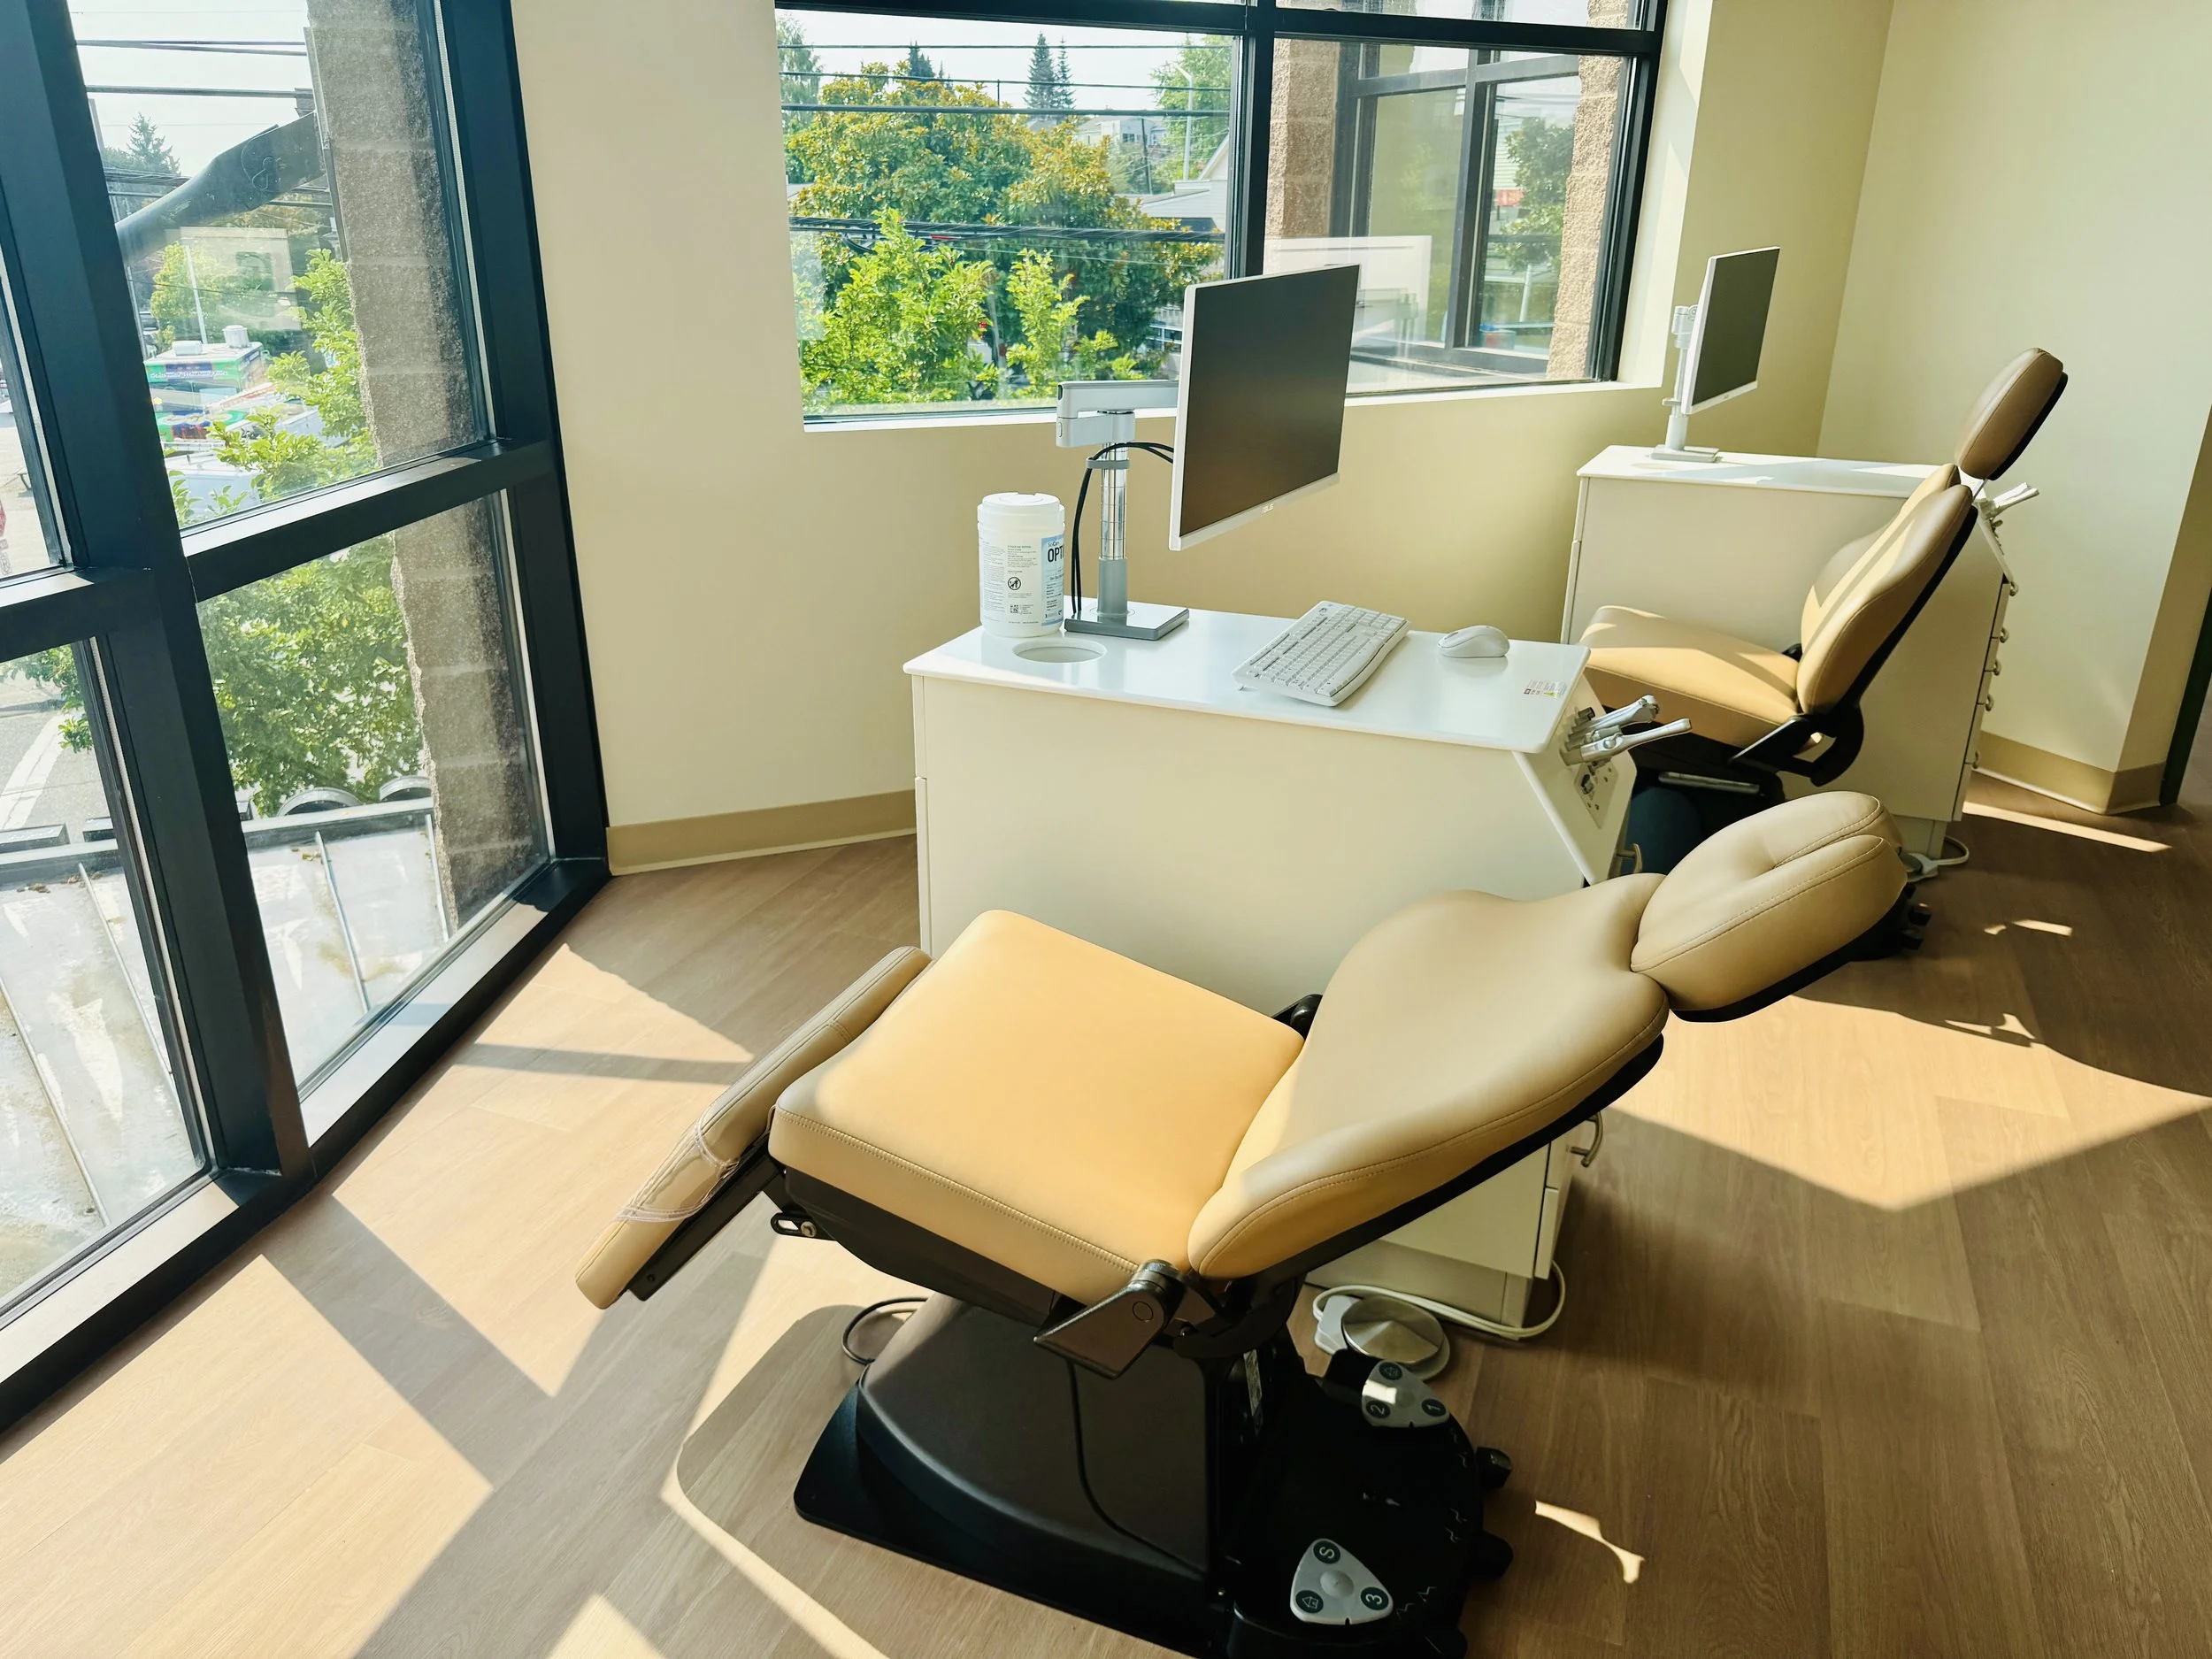
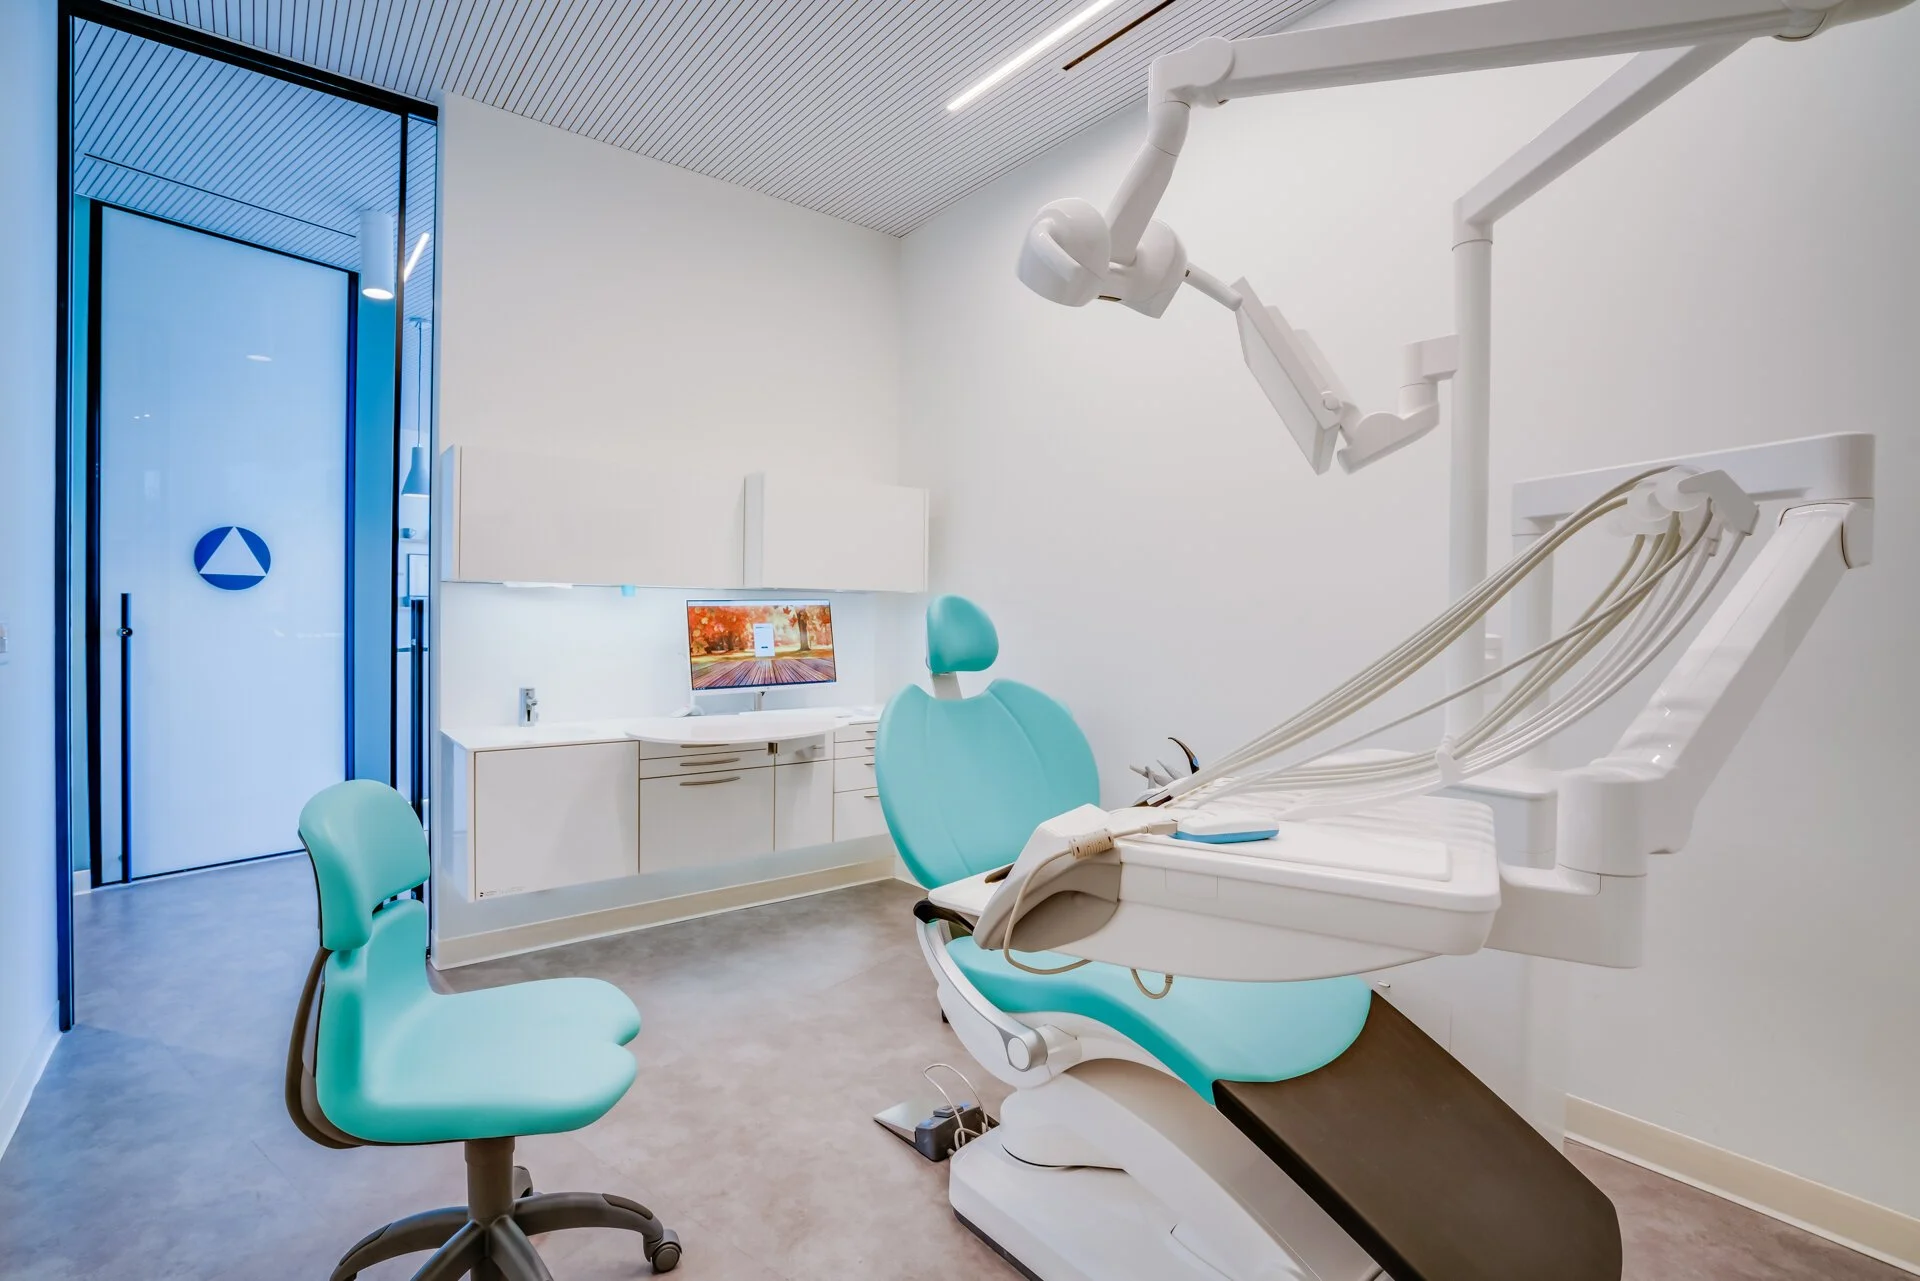
Treatment Bays & Brushing Stations
Treatment bays are often open or semi-open, giving patients a sense of community while keeping staff workflows efficient. Dividers or freestanding partitions add privacy where needed. Brushing stations, placed right in the bay, encourage patients to clean up before or during appointments, helping to keep clinical spaces neat.
Patient Demographics Drive Design
Orthodontics serves a wide range of patients — from children getting their first braces to adults choosing clear aligners. Offices must be designed to support these different needs with comfortable waiting areas, private consultation spaces, and treatment bays that handle volume without feeling crowded.
Putting It All Together
A complete orthodontic practice layout — like this one below with 5 treatment chairs in 1522 sq. ft. — shows how each piece fits into the bigger picture. When sterilization, imaging, treatment, consultation, and waiting areas are all aligned, the result is a practice that feels natural for patients and efficient for staff.

Final Word
Designing for orthodontics is about more than square footage and equipment. It’s about creating a flow that feels intuitive for patients and seamless for the team. By focusing on sterilization hubs, patient-centered consultation spaces, and flexible design choices, orthodontic practices can elevate care, boost efficiency, and prepare for future growth.
If you’re planning a new orthodontic office or rethinking your current layout, thoughtful design will be one of the best investments you make.

Design can be a Moneymaker: Behind the Design at SmileCraft
It all begins with an idea.
Most dental offices spend nearly 30% of their production on payroll — usually the single largest expense. But with smart design, you can cut labor waste, increase efficiency, improve patient perception, and make your space feel like a modern, high-tech practice.
That was our goal designing SmileCraft, a startup built from the ground up with workflow, efficiency, and technology in mind. Less than one year in, SmileCraft earned 14 five-star Yelp reviews, with patients repeatedly mentioning how “clean,” “organized,” and “high-tech” the office feels.
Here’s how we designed it — and how the practice is saving over $30,000 per year in labor through smart planning.
✅ Step 1: Centralize Sterilization

We worked with Kappler Design to locate sterilization within 40 feet of every operatory. According to Dental Economics, the average assistant walks into sterilization about 100 times per day. When it’s too far away, that time adds up quickly.
💰 Real impact:
Extra 30 seconds per trip
100 trips/day = 50 minutes wasted/day/assistant
At $20/hour, that’s $5,940/year per assistant
With 2 assistants = $11,880/year saved
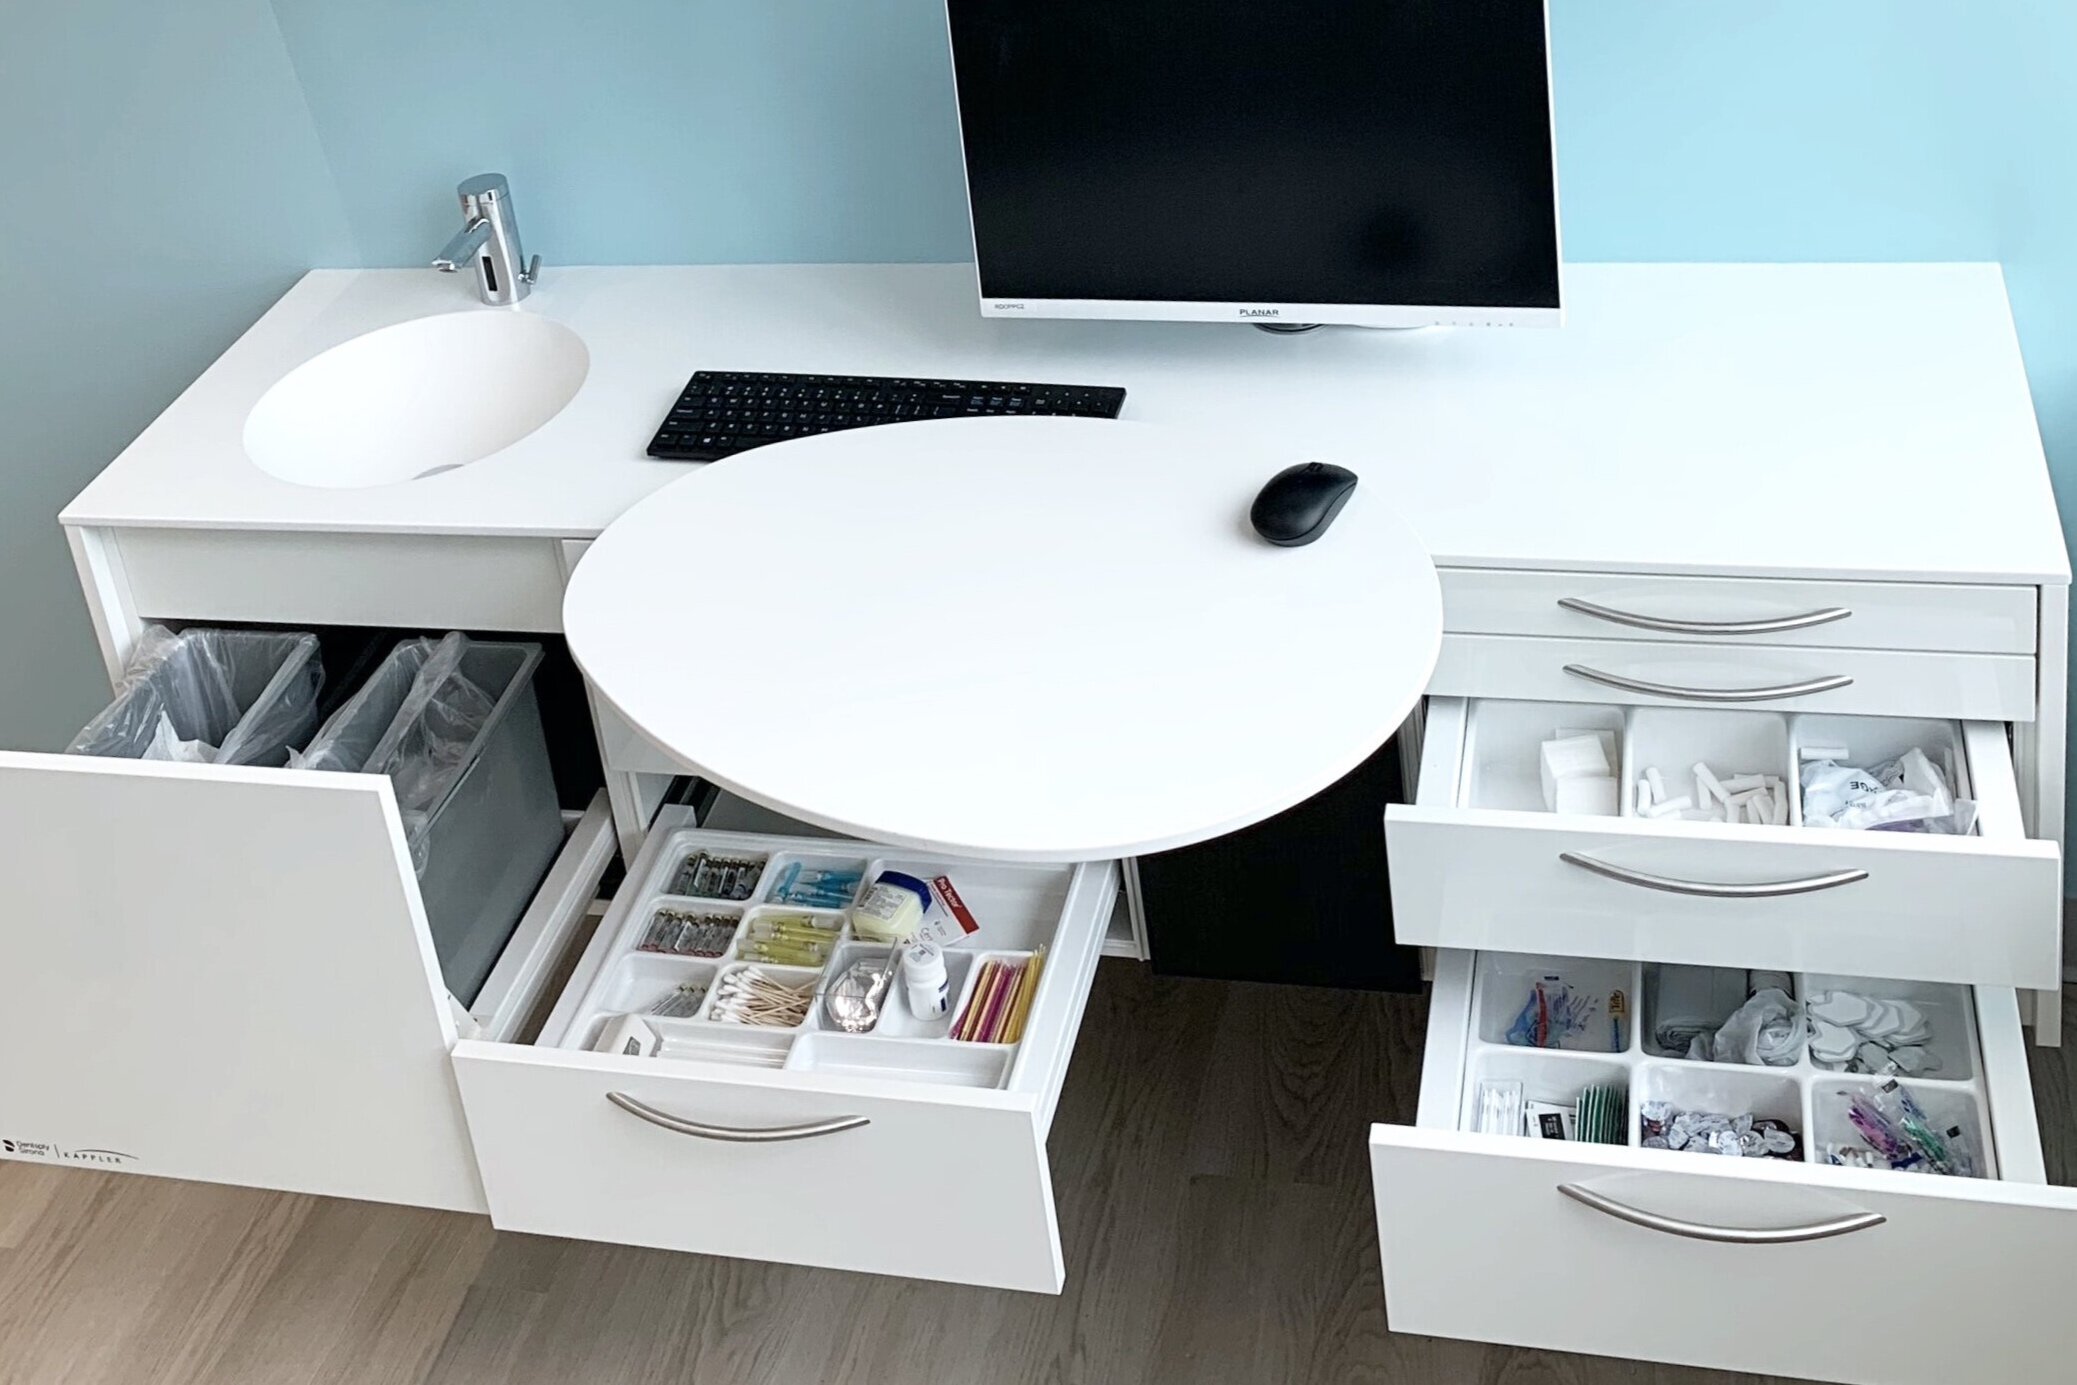
✅ Step 2: Use Tubs and Cassettes

SmileCraft standardized their setup using instrument cassettes and color-coded procedure tubs. Instead of hand-washing, ultrasonicing, drying, and sorting every instrument set, they use a Scican instrument washer and central prep area.
💰 Real impact:
40 hours saved/month (Dental Economics)
At $20/hour = $9,600/year saved
✅ Step 3: Single-Entry Operatories
Each operatory features a single private entry and a 6-foot rear cabinet, giving staff more usable storage at the 12 o’clock position. This reduces the need to leave the room and keeps procedures flowing smoothly.
💰 Real impact:
Missed supply trips: 2 minutes/trip × 4 trips/day = $950/year
Faster op turnover with organized tubs/cassettes = $4,276/year saved
Total: $5,226/year saved
✅ Step 4: Leave Working Space Around the Chair

We maintained at least 3 feet around the treatment center and 2 feet behind the rear cabinet, allowing the doctor and assistant to move freely and access the 12 o’clock position without adjusting the chair or patient.
💰 Real impact:
30 seconds saved per patient = ~$1,500/year in doctor time
(Based on 10 patients/day, 20 days/month, $1.25/min value)
✅ Step 5: Standardize Op Layouts
Every operatory is organized the same way — doctor drawer on the left, assistant and hygiene drawers on the right — using Kappler drawer inserts. This eliminates guesswork and increases confidence for the entire clinical team.
💰 Real impact:
1 minute saved per procedure × 6/day = ~$1,875/year
(Based on combined staff time at $1.25/min)
🔢 Total Estimated Annual Labor Savings
Centralized Steri $11,880
Tubs & Cassettes $9,600
Single Entry + Turnover $5,226
Clear Working Space $1,500
Op Standardization $1,875
Total $30,081/year
Want your next office to work this hard for you?

Why Intelligent Design Matters – Rethinking Operatory Layout
It all begins with an idea.
Intelligent design is the foundation of a successful dental office. Too often, I see projects that launch with pre-set plans and layouts—without optimizing space, workflow, or aesthetics. Many in the industry default to what’s familiar, missing key opportunities to elevate the patient experience, improve profitability, and streamline clinical flow.
One of the most critical early design decisions is operatory layout strategy. This choice impacts every aspect of how the office functions day-to-day and how it will scale into the future.
There are essentially three primary ways to configure operatories in a dental practice. The example below highlights a single-entry layout, and why it’s worth strong consideration:
1. Capacity Advantage – More Ops in the Same Space
In a 65' span, a single-entry layout can often accommodate one additional operatory compared to a dual-entry design. In larger offices, this difference can grow to two or even three extra operatories—without sacrificing comfort or functionality. That’s a major advantage in long-term production potential and ROI.
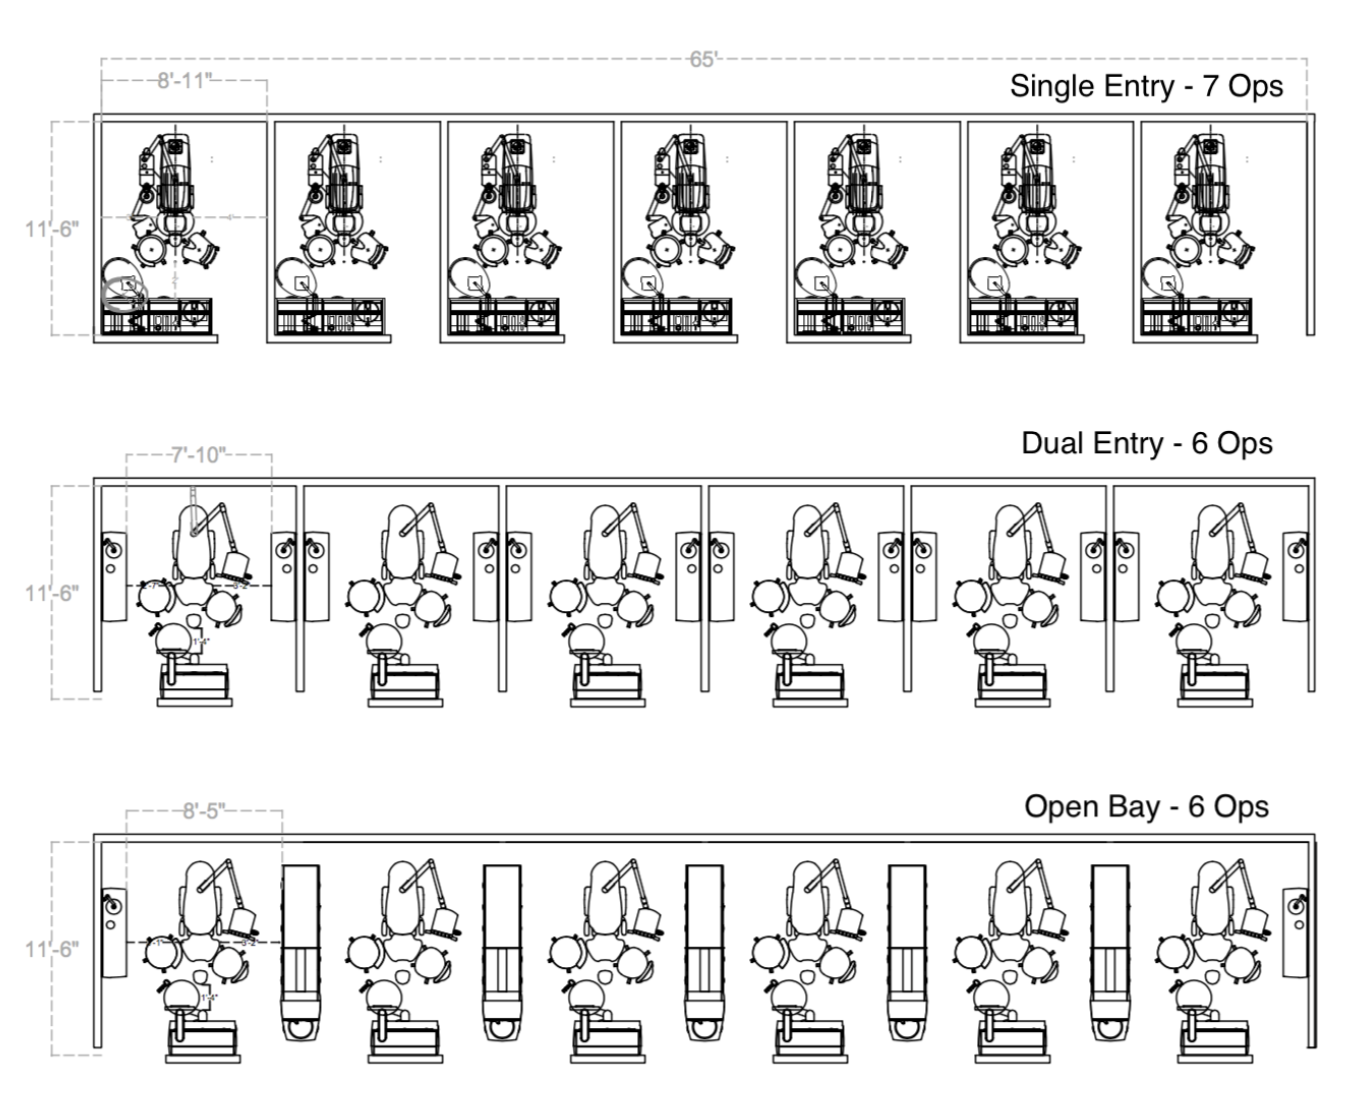
2. Operatory Space & Ergonomics
In this example, the layout provides generous space around the chair, including 4 feet of clear space on the doctor’s side. This supports an open, comfortable feel and unrestricted movement for both the doctor and assistant.
Critically, the design accommodates full access to the 12 o’clock position—essential for ergonomic treatment of the upper palate (mirror view) and lower arch (direct vision). Many outdated layouts ignore this position entirely, limiting clinical flexibility.
There’s also intentional space for guest seating and patient belongings, creating a more thoughtful and accommodating experience.

3. Privacy & Sound Isolation
Single-entry design naturally enhances patient privacy. It creates a quiet, enclosed space where patients feel secure discussing their health history or simply relaxing while waiting for the doctor.
From a team perspective, the reduction in noise pollution is significant. Gone are the days of blasting music to cover up suction, handpieces, and HIPAA-sensitive conversations. With a door closed, the difference is night and day.
4. Integrated Storage & Technology
Modern rear cabinets give assistants easy access to all supplies without needing to leave the room or spin to a side cabinet—supporting uninterrupted patient care and reducing unnecessary movement.
New technologies and 21st-century call systems allow assistants to stay focused in the operatory rather than running back and forth for materials.
5. Debunking the “Clutter Myth”
Some believe that single-entry designs create cord clutter and trap assistants—but that’s only true with outdated, non-integrated equipment. As you can see from the overhead view, when the equipment is fully integrated and strategically positioned, the space is clean, open, and efficient.

Final Thoughts
This early layout decision shouldn’t be made based on what you’re used to. Forget how you worked in the past—your new future shouldn’t be designed by looking backwards.
A well-executed single-entry design creates a better patient experience, a more productive clinical environment, and a quieter, more focused workspace. Let’s take a deeper look at the strengths and tradeoffs of this approach:

The Dental Office Design Roadmap: 6 Steps to a Smarter, More Profitable Practice
It all begins with an idea.
Designing a dental office is about more than just picking cabinetry and colors—it's about building a space that supports your clinical goals, your team’s efficiency, and your patients’ experience for years to come.
That’s why I created the Dental Office Design Roadmap—a six-phase approach developed from helping over 400 dental offices across the country turn their vision into reality.
Whether you’re building from the ground up or remodeling an existing space, following this roadmap will help you avoid costly mistakes and create a practice that performs.
Step 1: Clarify Your Vision
Every successful office starts with a clear definition of your goals:
What procedures do you want to perform?
What kind of patient experience are you trying to create?
Are you building for now—or planning for long-term growth?
This phase anchors your entire project and ensures that every decision is made with purpose.
Step 2: Build Your Team
The right partners make all the difference. You’ll need a trusted network that includes:
An equipment and design consultant
An architect with dental experience
A general contractor who understands clinical space
Bringing the team together early keeps everyone aligned and minimizes surprises later.
Step 3: Develop the Floor Plan
This is where your vision becomes tangible. We focus on:
Workflow efficiency
Patient flow and privacy
Operatories, sterilization, imaging, and staff areas
The right layout will improve productivity, ergonomics, and long-term flexibility.
Step 4: Select Equipment and Technology
Now that the layout is defined, we select integrated solutions that support your daily procedures:
Chairs, delivery systems, cabinetry
CBCT, sensors, and software
Suction, air, and mechanical systems
We ensure everything fits within the design—and within your budget.
Step 5: Finalize Construction Documents
At this point, your architect and contractor will finalize drawings, specs, and permit sets. My role includes:
Reviewing plans to protect your workflow
Coordinating equipment specs and rough-ins
Avoiding costly change orders through proactive planning
Step 6: Build and Install
Construction begins—but our work doesn’t stop:
I coordinate equipment deliveries, install schedules, and service teams
We confirm integration and room flow works as intended
I’m available for support through move-in, training, and beyond
Avoid the Mistakes. Follow the Roadmap.
Too many dental offices suffer from poor layout, underutilized space, and costly design oversights. The Office Design Roadmap helps prevent that—guiding you from concept to completion with clarity and confidence.
If you're planning a remodel, expansion, or new build, let’s talk. I’d be happy to share this roadmap with you and help you take the next step in designing a smarter practice.

Blog Post Title Four
It all begins with an idea.
It all begins with an idea. Maybe you want to launch a business. Maybe you want to turn a hobby into something more. Or maybe you have a creative project to share with the world. Whatever it is, the way you tell your story online can make all the difference.
Don’t worry about sounding professional. Sound like you. There are over 1.5 billion websites out there, but your story is what’s going to separate this one from the rest. If you read the words back and don’t hear your own voice in your head, that’s a good sign you still have more work to do.
Be clear, be confident and don’t overthink it. The beauty of your story is that it’s going to continue to evolve and your site can evolve with it. Your goal should be to make it feel right for right now. Later will take care of itself. It always does.